Frequently Asked Questions
Contact
We’re ready to help you with any questions or requests by email at info@botanopia.com.
Please note : as very small business, we are currently unable to offer customer service via phone. But we do reply to your emails very quickly!
We also have a lot of answers to our most commonly asked questions, from product-specific questions to shipping and ordering topics.
Have a look here, and hopefully, you will find the answer quickly. If not, get in touch. If your question is very good, we might even feature it in our FAQ 😉 …
Our business hours are Monday-Friday, from 8am to 5pm, Amsterdam time (CEST). We strive to get back to you within one business day, often within a few hours.
But once in a while we still sneak in behind the computer outside of office hours, you never know…
Buying Botanopia Products
Well, directly here in our online shop is a great start 🙂 if we may say so ourselves…
We’re open 24/7, have the largest selection of Botanopia products IN THE WORLD, and all orders placed on weekdays before 2PM ship the same day. What’s not to love?
We only have an online store, no physical locations. But we work with hundreds of cool independent stores across the world that carry our products. You can find a map right here with all the locations.
We work with hundreds of cool independent stores across the world that carry our products. You can find a map right here with all the locations.
Please note that each store can decide for themselves which products they carry from our range. We don’t have real-time information regarding their stock levels, nor the exact products they have in store at the moment. It’s always a good idea to contact a store before you visit, to check if they have your desired product on hand.
Shipping and Returns
We do! Add your desired products to your shopping cart for an estimate of the shipping costs to your exact location.
The shipping of products containing seeds or liquids is trickier, as many countries restrict the import of foreign plant matter for fear of diseases and pests. We only ship those within the European Union.
We ship worldwide. If you’re outside of the EU, this is important information**.
For a preview of the shipping cost, add your desired products to the cart and fill in your postcode/country. The appropriate fee will be calculated based on your location and the weight of your package.
We send our products with the Dutch postal service (PostNL), or DPD, depending on the location.
You’ll receive a tracking code for your package by email as soon as it receives a first scan at the post office. This email sometimes ends up in your spam, so make sure to check there as well.
For countries close to our home base of Amsterdam, NL, we can offer free shipping:
–Free shipping within the Netherlands, Belgium and Germany for retail orders above 50€.
–Free shipping within France, Denmark and Austria for retail orders above 75€.
–Free shipping within the EU for retail orders above 100€.
**Customers outside the EU please note : all our shipments are sent DDU (Delivery Duties Unpaid), customers outside of the EU might be required to pay customs fees or duties when receiving their package. Some countries also restrict the importation of seeds and plants. We do not know the regulations in your own country, please get in touch with your local customs office for information.
We do our best to ship your order out as soon as possible.
Retail orders placed before 2pm will be shipped out the same day, Monday-Friday.
These are the estimated delivery times:
* Shipping within The Netherlands: 1-3 business days
* Shipping within Europe: 3-20 business days
* Worldwide shipping: 6-30 business days
You’ll receive a tracking code for your package by email as soon as it receives a first scan at the post office. This email sometimes ends up in your spam, so make sure to check there as well.
Shipping time is not within our control. We cannot be held responsible for delays and/or damages caused by the shipping company or customs clearance. Due to the global pandemic, shipping prices and duration are changing every day. As such, we cannot give you any guarantees regarding shipping time.
Once your package has been shipped, you receive an email with the subject line “Your Botanopia order from (your order date) is complete”.
This emails contains your tracking link. Big shopper? It’s possible that we’re sending your order out in more than one box. In that case, there will be a tracking link for each box in your email.
If you’ve made an account on our website, you can also find your tracking number (and order history) right here.
For countries close to our home base of Amsterdam, NL, we can offer free shipping:
–Free shipping within the Netherlands, Belgium and Germany for retail orders above 50€.
–Free shipping within France, Denmark and Austria for retail orders above 75€.
–Free shipping within the EU for retail orders above 100€.
We send our products with the Dutch postal service (PostNL), or DPD, depending on the location.
After purchasing products, you have the right to return the items within 30 days after delivery as long as the products have not been used and are in intact re-saleable condition.
If you wish to return items:
- Email us first, so we know to expect your return package. We’ll give you the correct return address.
- The products need to be returned with all accessories and in the original condition and packaging. You are responsible for returning the goods undamaged, so make sure they are properly packaged for their return journey. Make sure to keep your proof of sending and tracking number until we’ve received the package.
Return shipping costs are the responsibility of the customer.
Refund of your payment will be done as soon as possible within 7 days after the reception and control of the items to confirm they are whole and undamaged.
Botanopia doesn’t charge a restocking fee.
If you change your mind and want to return a product, the return shipping costs are at your expense.
Of course, Botanopia will pay the return shipping costs if you need to return a product because something is wrong with it.
We cannot accept return packages without a tracking number or insufficient postage.
You’re not home to receive your package? The package delivery service will do all it can to deliver the package as soon as possible. Please read the message that the driver has left in your post box to see what you can do to receive your package as soon as possible.
Can’t find a note in your post box? You can also check the package information with the tracking code you received by email.
We ship out orders Monday to Friday. Orders placed before 2PM are shipped the same day. You’ll receive an email with your tracking code as soon as your package receives its first scan ( usually late in the night after we’ve handed it over to the carrier).
From there, it’s up to the carrier, who will do their best to deliver your plant products as fast as possible. You can find an overview of the average delivery times for your destination here.
This emails contains your tracking link. Big shopper? It’s possible that we’re sending your order out in more than one box. In that case, there will be a tracking link for each box in your email.
If you’ve made an account on our website, you can also find your tracking number (and order history) right here.
Customer Service
At Botanopia we process your order directly so that you can also receive it fast. It is therefore not possible to change your order afterward. Is your situation very urgent? Please contact us directly. Don’t forget to mention your order number so that we can help you faster.
Yes of course, we’d love to help you choose the perfect product for your needs.
Let us know what you’re looking for or who you’re shopping for, and we can give you our suggestions from there.
If you already have an account, you can login right here.
Oops! Sorry to hear that. Email us with your order number and a picture of what you received, so we can fix it for you.
Oh no! Sorry to hear that. Let’s get started fixing the issue.
Step 1 – Take pictures of the damage and, very important, also take pictures of the outside shipping box with your address label clearly visible. We need 5 pictures to file a claim with the transport company. (This is also outlined clearly on the “check your package” instruction card included in your order).
Step 2 – Send us your pictures, along with your order number, and we’ll take it from there.
Once your package has been shipped, you receive an email with the subject line “Your Botanopia order from (your order date) is complete”.
This emails contains your tracking link. Big shopper? It’s possible that we’re sending your order out in more than one box. In that case, there will be a tracking link for each box in your email.
If you’ve made an account on our website, you can also find your tracking number (and order history) right here.
As soon as your package leaves our warehouse, you will receive an email confirmation that contains the tracking number that you can use to keep an eye on your package.
Your package cannot be found? Please contact us!
You’re not home to receive your package? The package delivery service will do all it can to deliver the package as soon as possible. Please read the message that the driver has left in your post box to see what you can do to receive your package as soon as possible.
Can’t find a note in your post box? You can also check the package information with the tracking code you received by email.
We ship out orders Monday to Friday. Orders placed before 2PM are shipped the same day. You’ll receive an email with your tracking code as soon as your package receives its first scan ( usually late in the night after we’ve handed it over to the carrier).
From there, it’s up to the carrier, who will do their best to deliver your plant products as fast as possible. You can find an overview of the average delivery times for your destination here.
After purchasing products, you have the right to return the items within 30 days after delivery as long as the products have not been used and are in intact re-saleable condition.
If you wish to return items:
- Email us first, so we know to expect your return package. We’ll give you the correct return address.
- The products need to be returned with all accessories and in the original condition and packaging. You are responsible for returning the goods undamaged, so make sure they are properly packaged for their return journey. Make sure to keep your proof of sending and tracking number until we’ve received the package.
Return shipping costs are the responsibility of the customer.
Refund of your payment will be done as soon as possible within 7 days after the reception and control of the items to confirm they are whole and undamaged.
Yes! Enjoy free shipping to destinations close to our Amsterdam headquarters, as follows:
The Netherlands, Belgium, Germany: Free shipping for orders above 50€
France, Denmark, Austria: Free shipping for orders above 75€
Rest of the European Union: Free shipping for orders above 100€
We currently do not offer free shipping for other destinations outside the EU.
Yes! You’ll receive a confirmation email right after placing your order. The subject line of the email is “Your Botanopia order receipt…”
Can’t find the email? These are the 3 most common issues:
- There was a typo in your email, so we couldn’t send the confirmation. Get in touch with us to let us know, so we can also correct your email to send the tracking link for your package.
- Your payment didn’t go through. If your payment was unsuccessful, you can simply try again.
- The confirmation email landed in your spam or promotions tab. Have a look in there and if you find it, make sure to whitelist our email address so you will also receive your tracking link without issues once your package has shipped.
Still need help? Get in touch.
Payment Information
Don’t worry! Just try again. You can still find your products in the shopping cart. Is it still not working for you? Please contact us, we’re here to help!
The following methods are available (depending on your location):
Bargain hunter, aren’t you? Sign up to receive our plant tips and exclusive offers right here. You’ll also receive 10% off your first purchase.
Who doesn’t love a discount? You can enter your code in your shopping cart. This is what it looks like:

We’re very sorry to hear that! Please contact us and we will do our best to solve the issue promptly. If you can share a screenshot of the problem, we can help you even faster.
Please note that the discount code you receive when signing up for our newsletter is only valid for retail orders, not for wholesale (resellers).
Gift Cards & Purchasing A Gift
We get it, sometimes it’s hard to know which product would really be the best fit to surprise a loved one. Gift cards to the rescue! You can’t go wrong with them, and you’re ensured the recipient will be delighted with your present.
You can select the amount of your choice for the gift card right here. The card is then sent digitally to your email, or directly to the email of the recipient, if you prefer.
Do you want a physical card to hand out? We’ve got several options for designs you can download and print out at home.
Lucky you, you’ve got a gift card or promotional code? You can enter the code in your shopping cart. This is what it looks like:

Yes, as long as there are sufficient funds.
Yes, we love to see our products being gifted to your loved ones!
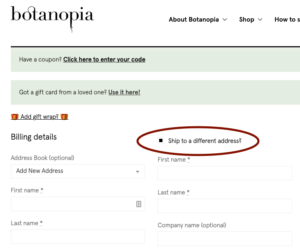
In the shopping cart, you can specify a billing address (you) and a shipping address (the lucky recipient).
Please note, if you are shipping a gift from our shop (in the Netherlands) to another country outside of the European Union, the recipient might need to pay a customs import fee when they receive their package. Some products that contain liquids or seeds can also only be shipped within the EU.
This is what the option looks like in your cart.
Topics for Wholesale Customers and Resellers
Yes we do! Are you a store owner interested in reselling our products? We’d love to work with you.
Your invoice is emailed to you as an attachment to your order confirmation email.
If you’re paying by bank transfer, you first receive a pro-forma invoice by email, then your final invoice after we’ve received your payment.
You also can download all your invoices and consult your order history at any time in your wholesale account.
You can login right here (also found under the menu tab “Wholesale”)
Lost your password? You can reset it directly on the login page. Your username is the email address you used when you created your wholesale account.
We have a Downloads Library available right here. You can also find it in the menu under Wholesale>Downloads Library
We do! Head over here for all info.
You can also find it in the menu under Wholesale>Resources for Resellers.
We also have handy tips and sales guides for you.
You can update all your details right here in your account.
Once your package has been shipped, you receive an email with the subject line “Your Botanopia order from (your order date) is complete”.
This emails contains your tracking link. Big shopper? It’s possible that we’re sending your order out in more than one box. In that case, there will be a tracking link for each box in your email.
If you’ve made an account on our website, you can also find your tracking number (and order history) right here.
We currently don’t have a sampling service.
If you’d like to try a product before you place your wholesale order, you can place a retail order for that product. If you then place a wholesale order after evaluating the product, we will refund the price difference of the product between retail and wholesale on your order.
For all the details regarding wholesale returns, head over to our Wholesale terms & conditions.
For all the details regarding wholesale shipping, head over to our Wholesale terms & conditions.
For all the details regarding wholesale shipping, head over to our Wholesale terms & conditions.
Press & Social Media
Yes! We’re quite active on Instagram, but you can also find us on Pinterest and Youtube.
We do! If you have a plant or interior-related account that you think would be a good fit, get in touch with us with your ideas.
Do you love plants and interior design?
Would you like to earn a commission on Botanopia products, via your blog, website, or social media? Then have a look at our new affiliate program.
Great to hear you’re interested in publishing about our products! Get in touch with your questions so we can help you out.
Great to hear you’d like to feature our products in your photos!
Get in touch so we can arrange to lend you products for the photoshoot.
Cyanotype Kit
A cyanotype is a photographic printing technique and one of the oldest processes in the history of photography. The results can easily be recognized by their intense cyan-blue color, which is created through its exposure to sunlight. The process of cyanotype was discovered in 1842 by the English scientist John Herschel in order to reproduce notes and diagrams. Anna Atkins, a British botanist and photographer, first used the technique to document the beautiful shapes of her local seaweed varieties and is considered to be the first woman photographer. Her book famous book ‘Photographs of British Algae: Cyanotype Impressions’, was the first book to be photographically printed and illustrated. The technique has been widely used by artists and photographers, but also engineers, as a way to create affordable copies of technical drawings. To this day, we use the term “blueprint” to mean a technical drawing, for example for the floor plan of a house.

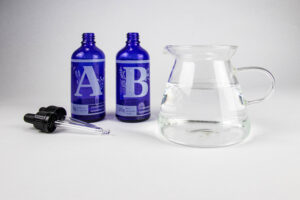
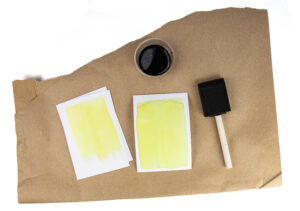
To create beautiful cyanotypes, you need a mixture of two different solutions (A + B). The necessary chemicals come in powder form. As a first step, you’ll need to add water to each bottle, to create a solution. Shake the bottles very well to make sure all the chemicals are dissolved. Once you mix the A and B liquids together, they will become sensitive to UV light. Apply an even coat of this mix to your surface (paper, textile or even wood) and let it dry fully in the dark.
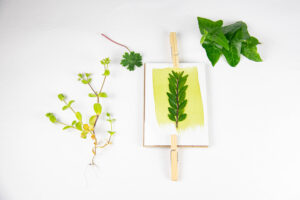
Next, think of your layout and composition. You can play with different objects (plants, flowers or flat objects will work well) and place them directly on your coated surface. To keep them in place, it’s helpful to weigh them down with a sheet of glass. When you are satisfied with your composition, you can expose it to the sun. The necessary exposure time will vary depending on the weather conditions, the height of the sun in the sky, and the type of objects you are exposing. In the sunlight, the color of the emulsion will slowly shift from a yellow-green to a bronze-gray color. You can begin with an exposure time of 10 min, and start adjusting from there.
After exposure, rinse your paper in a tray, under running water. Be careful not to hit your print directly with a strong jet of water, as it might damage the fragile paper.
This is when the magic happens! The area of the image that was exposed to UV light will take on the cyan blue color, and the parts of the paper that were protected from the light will rinse out.
The blue color intensifies as it dries and further oxidizes in contact with the air. You’ll get the darkest color after about 24hrs. You can also speed this up by using a couple of drops of hydrogen peroxide in your last rinsing water.
The chemicals required to make cyanotypes are (A) potassium ferricyanide and (B) ferric ammonium citrate. These two chemicals are presented in the form of a powder that is mixed with water, to become the cyanotypes sensitizer. While neither is highly toxic, you should avoid breathing the powders in. Always add water to your cyanotype powder (inside the blue bottles) and not the other way around. This way you’ll avoid having the powder dispersing in the air.
The cyanotype technique does not present any significant health risk. However, common sense applies. Do not ingest or inhale the chemicals, and wear gloves when handling the solutions.
Here are the Safety Data Sheets for the active chemicals: (A) potassium ferricyanide and (B) ferric ammonium citrate.
In powder form, each component (A and B) will last several years. Once mixed with water, the solutions can be kept for about a year, in their separate bottles. It’s possible that mold starts to form in the liquid. If this is the case, you can filter the liquid with a coffee filter and still use it.
Once you mix the 2 components A+B together, you should use the emulsion immediately, so only mix what you can use right away.
The Botanopia Cyanotype Kit has not been designed for children and has also not been tested for children. However, it can still be a very fun activity to do together with children. Once an adult has prepared the solutions and coated the paper, supervised children can continue with the next steps of the process and create their own artwork in the sun. Let them play around with different plants, leaves and flowers
The cyanotype emulsion reacts only to Ultraviolet light. Sunlight contains UV light, but if you’d like to make cyanotypes without sunlight, you can use artificial UV light for exposure. You can often find inexpensive second-hand sun-tanning lamps as your source of UV light. Small desktop models meant for tanning your face are a good choice to get you started.
Exposure and light
You don’t need a hot summer day to make cyanotypes. Even on a cloudy winter day you can expose your cyanotype prints with a few adjustments. In winter, there is less amount of sunlight available. The best time to work is around 12 noon, when the sun it at its highest point in the sky. You will need to increase the exposure time during the winter months. For example, a print that would take 5 min of exposure on a sunny summer day, might need 20 min of exposure on a cloudy winter day. Make sure to protect your work from any raindrops falling on the surface during the exposing process.
Yes, you can make cyanotypes without sunlight, as long as you have another source of UltraViolet (UV) light. UV lights are found in sun-tanning lamps for example. You will need to test the correct exposure time for your specific lamp.
The glass on your home’s windows may block some of the UV rays available in sunlight. While it’s not impossible, you’ll get better and faster results exposing your prints directly outside. Alternatively, you can also use an artificial source of UV light if you want to expose your cyanotypes without sunlight.
Yes, cyanotypes work on cloudy days and you can definitely expose them, it will just take a bit longer. For example, a print that would need 5 min of exposure on a sunny day, might need 20 min of exposure on a cloudy day. If it’s also a little rainy, make sure you protect your prints from potential raindrops…
The exposure time can vary depending on a lot of different factors, such as how sunny it is, the time of the year (winter/summer), and also the type of plants that you want to expose. For example, if you’d like to achieve beautiful transparency effects on thin petals, like a poppy flower, you’ll need extra exposure time. Too long, and the thin petals will completely disappear. So it’s all about experimenting and adjusting, based on your own situation.
Absolutely. If you’ve prepared your paper and let it dry away from sunlight, you can keep it for many months, as long as you keep it completely in the dark. Prepare a whole stack of paper and save it in a completely opaque box for the perfect sunny day to expose.
For best results, you need paper that can handle getting wet and drying again. You need to rinse your cyanotype extensively under water, so your paper will need to survive a long bath. Paper made for watercolors is always a good choice. Traditionally, premium watercolor papers are made of cotton (also called rag paper). For all papers, we recommend a thicker stock, at least 200gsm. Avoid papers that have a coating that will prevent your emulsion from absorbing into the fibers. You can also experiment with different colors of paper that will complement the blue tint of your print.
Yes, absolutely. Paper is made of cellulose, most often from wood pulp. So wood can act quite in the same way as paper when used in combination with the cyanotype technique. It can be a bit hit-and-miss though, depending on the exact type of wood you’re using, there are so many essences of trees. So you’ll have to experiment. In general, solid wood tends to give better results than engineered types such as veneer or plywood.
Yes, the cyanotype technique also works well on textiles made from natural fibres. For example; cotton, linen, wool, silk, hemp, bamboo but also fabrics derived from wood pulp such as viscose. Make sure to wash your fabric thoroughly first to remove any traces of starch or other stiffeners often used in the production process.
Cyanotypes are quite sensitive to detergents and soaps. If you make cyanotypes on textiles, they won’t be very washable. You can attempt to carefully hand wash your fabric, but always test a small corner first. Be sure to use a soap or detergent that does not contain any phosphates, bleach, or sodium. Be prepared to experience some lightening of the blue color with every wash, no matter how careful you are.
Yes, ironing will not be an issue at all, just make sure to choose a heat setting appropriate for the type of fabric you used.
Cyanotypes are not completely UV-resistant and can indeed fade a little if they are constantly exposed to direct sunlight. But if kept under the right conditions, they can last decades. Choose a room for your print with normal daylight and no direct UV-light impact, and the Cyanotype should be fine
To preserve your Cyanotype in the best conditions, don’t place them in direct sunlight. They are not entirely resistant to the impact of UV-light and can therefore fade. To further protect your print, you can frame the cyanotypes with UV-resistant glass and store them in a dry, cool environment with plenty of oxygen. If fading occurs, you can bathe your Cyanotype in hydrogen peroxide to restore its original color. The blue colors will also regenerate by placing the print in a dark space, such as a drawer or a cupboard, as long as enough oxygen is present.
If you want to embark on the cyanotype adventure, a complete kit is the best way to get started. The Botanopia Cyanotype Kit includes all the materials and tools to create your first blueprint, including detailed instructions and a tutorial. Once you feel comfortable with the included paper sheets, you can try it on your own paper or textiles like cotton or silk.
The cyanotype process is mostly based on experimentation. There are a lot of parameters that contribute to the final product, such as the type of flower or plant you use, the exposure time, and the intensity of the sun you’re working with.
We’ve got some of the most common troubleshooting questions here in the manual. You can also have a look at our very detailed video tutorial for more tips.
Still not working for you? Get in touch!
The solutions A+B can have a slightly different color depending on the manufacturing batch. It can go from light yellow-green to a darker green-blue shade. That’s nothing to worry about. As long as you prepared your bottles according to our instructions, and mixed the right amount of emulsion to use right away, and out of the sunlight, then there’s no problem. If you’re in doubt: just test one print in the sun. You’ll soon see if the magic is happening as expected.
No, that’s exactly as it should be. We ship the solution as a powder or a concentrated solution inside the bottles. This way you can extend the shelf life even longer. Just add water, as explained in the instruction manual, to get started.
Nice to hear you’ve already made lots of beautiful prints!
If you’d like to buy paper in a shop near you, ask your local art supplies store for cotton paper, sometimes also called rag-paper.
We also have a refill pack available for your cyanotype kit.
Great to hear you’re ready for even more blueprints!
We have a refill pack available if you’re ready to make more.
The cyanotype technique is really exclusively blue. That’s even in the name, the colour cyan is the very beautiful blue shade you can expect your prints to be.
There are techniques to shift the colour of your blueprint to a slightly different hue, for example, more towards green, brown, black, or violet. If you’re interested in this, look up the term “cyanotype toning”. It can be done with common supplies like tea, coffee or wine, or with chemicals like soda ash.
Germination Plates
It depends on the type of plants you want to grow on your germination plate.
Size S: acorns, chestnuts, walnuts, beans, small bulbs like snowdrop and muscari, crocus, small cactus or succulent plants, cuttings such as spider plant or pilea.
Size L: avocado pits, larger succulents and cactus, larger flower bulbs such as tulips, paperwhites, narcissus or hyacinths.
Here’s a little video showing you how.
You don’t need to repot in soil, unless you want to. With suitable nutrients, your plant can thrive in water forever (it’s called hydroponics).
Should you want to repot your plant in soil or in the ground, no problem. Just gently pull out the plant from your germination plate and spread them around in their new pot. The plant will have to adjust and create new type of roots, but should recover quickly.
Sometimes you will see some staining on your germination plate after removing the plant. An easy and gentle way to clean them is to soak in vinegar or hydrogen peroxyde for a day or so. The staining is actually clinging to calcium deposit on the surface. You can also run your Botanopiathrough the dishwasher.
If you don’t have the patience to watch your seed grow and send roots through the opening of your germination plate, go for quicker options that look instantly lush:
Cuttings, such as the spider plant, pilea offshoots, philodendron or use traditionally grown cactus or succulent and rinse out the soil. Tutorial here. For lots of ideas, check out our gallery.
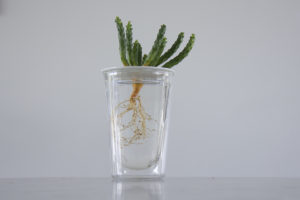
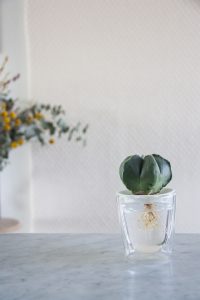
In the beginning, the seeds themselves contain big stores of energy for the growing plant. When it runs out, or if your plant is looking a bit sad, you can add a small amount of suitable nutrients to the water. Watch out that you don’t overdo it and burn the roots. We recommend this plant food.
Fill the glass with water almost all the way to the underside of the porcelain germination plate. Don’t let the roots dry out, refresh the water, every week or so. It’s also important to refresh the water, not just top it up, to make sure the water is well oxygenated.
Depends on the plant/seed you want to try. We’ve made lots of video tutorials for different plants to get you started.
Acorns, chestnuts, walnuts and other seeds from cold climates need to be germinated according to the cold treatment.
All other seeds like beans, avocado pits, and other warm-climate plant seeds can be germinated using the regular baggie method.
For all seeds: once you have a long enough root, place it on your Botanopiawith the root in the water and watch it grow.
Did you follow the instructions from our how-to?
If yes, and no results, here’s some pointers.
- It takes time. Don’t give up on your acorns yet, it can take between 3 to 8 weeks to start seeing signs of germination. The acorn needs to reach the right level of humidity and temperature to wake up and start growing.
- Not all seeds are viable. That’s just how nature works, only a percentage of seeds actually germinate. The germination rate decreases the older the seeds are. Increase your success rate by starting multiple seeds at once!
- Don’t put all your
eggsacorns in the same basket! While you’re waiting on one type of seed to germinate, try your hand at other sorts as well and give cuttings and cacti a try too.
There’s no shortcut to nature’s process. So sit back, relax, and watch the slow and peaceful progress your plants are making.
If you’re set on winning time, you can start by locating a germinated acorn already. In the northern hemisphere, roughly between November and April, you can search amongst the leaves at the foot of oak trees. With a bit of luck you’ll find several acorns that are already showing the first signs of sprouting, or even better, find some with a tap root already coming out. That will cut your waiting time by at least a month. If you live in a warmer climate, you might have live oak/summer oak growing around. These carry acorns far longer than their northern cousins.
So most of the time, seeds germinate in soil, where there isn’t a lot of contact with the air, so mould is not that common. When germinating seeds out of the soil, like we do we the baggie method, it happens more often. But no panic!
First thing is to make sure you wash your hands well before you handle your seeds and baggies. Warm, moist environments + bacteria and mould spores present in our houses = a perfect breeding ground for mould.
Second, you can gently wipe your seeds with a bit of diluted hydrogen peroxide, that you should cut down on the mould. Change the paper towel and bag, and keep going. Some species are more prone to mould than other, to be on the safe side, you could wrap your seeds each in their own towel to prevent cross-contamination.
In the end, mould won’t prevent the seed from germinating, but it’s just not very pretty to look at.
Here’s a little video showing you how.
Here’s a little video showing you how.
We’ve made a little “Avocado 101” video to answer your most common questions.
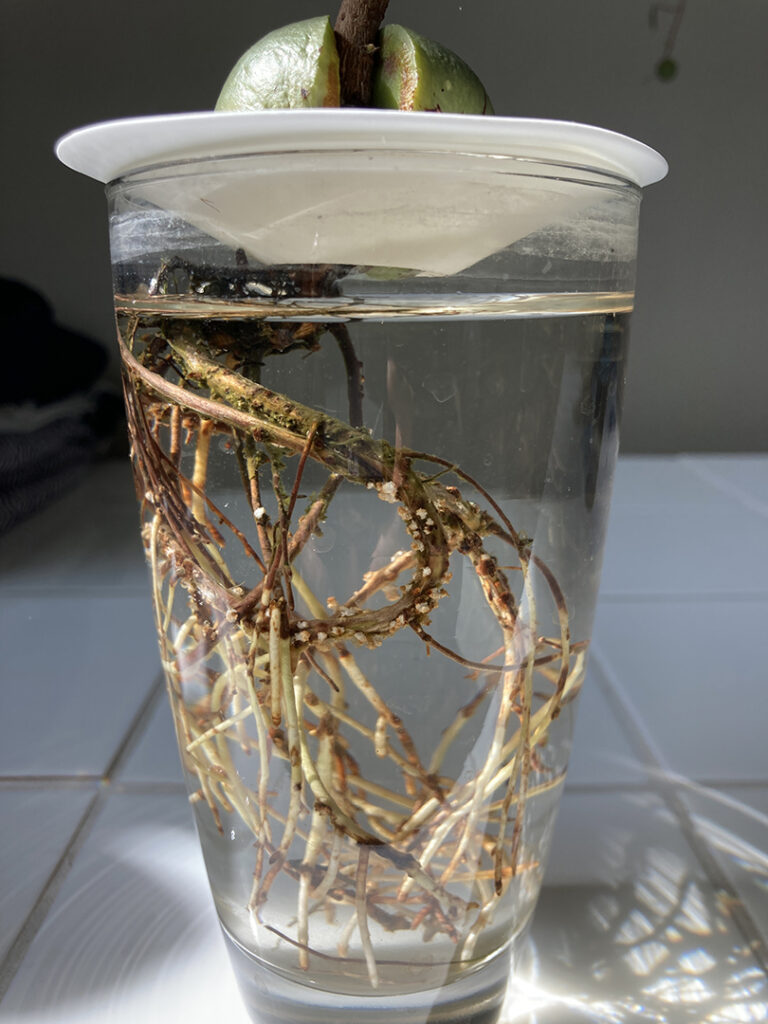
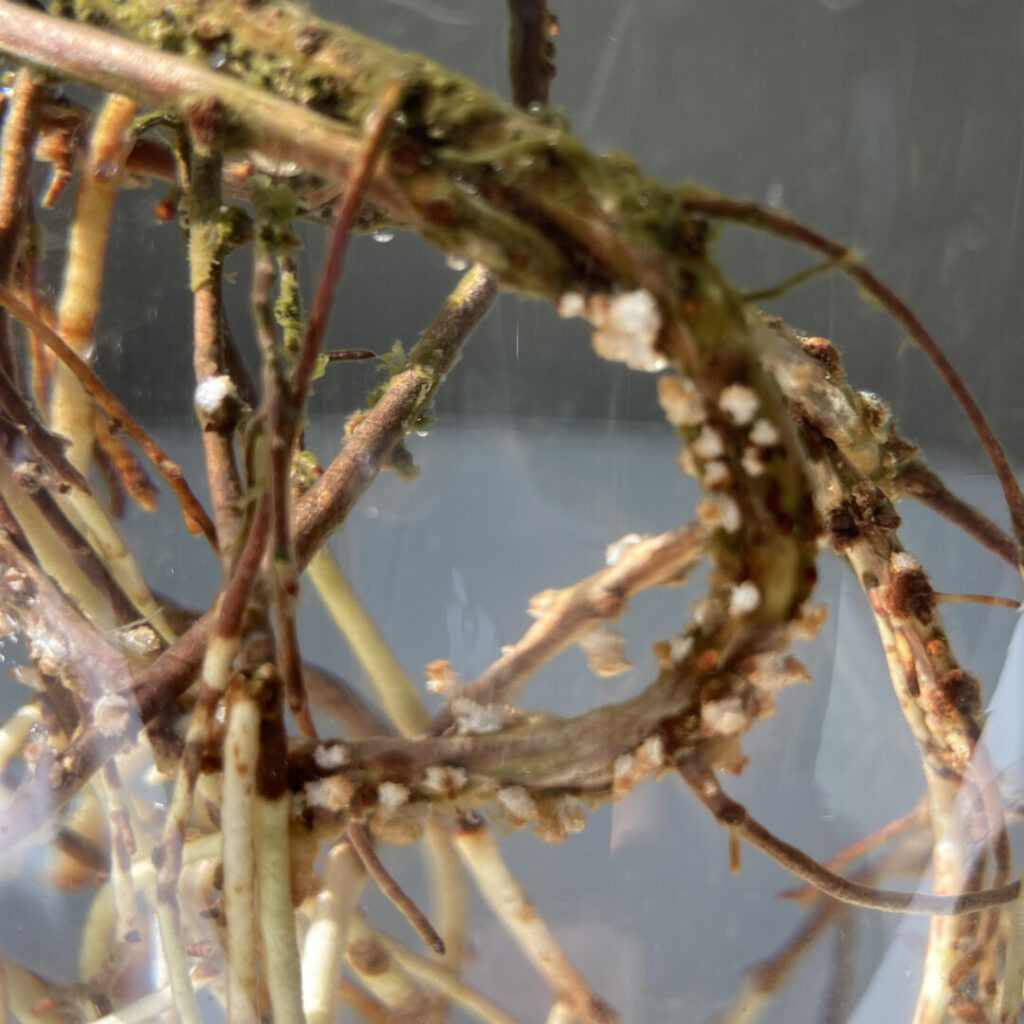
Sometimes you’ll notice white growth on the roots of your avocado plants in water. We’ve also seen it on other plants, such as our little oaks.
It usually grows in clusters along the roots, and can range from bright white to beige in color. No worries though, it’s pretty harmless and won’t hurt the growth of your plants.
You can simply rinse it off with a strong stream of water from your tap, or scratch it off with your fingernail. Don’t forget to change the water of your plant often, so the roots can stay well oxygenated.
Roots that are actively growing in water are usually white in color. If the tips of the roots are becoming brown though, it might indicate that your roots are no longer growing, or are dying off. This could be due to too much bacteria in the water, or to insufficient oxygen supply in the water, for example, if you don’t refresh the water often enough. Lastly, don’t forget to add nutrients in the water if you want your plants to thrive;
Plant Food (Fertiliser)
In general, you should fertilise your plants if it’s actively growing. Roughly from April to November here in Amsterdam. But if you see signs of growth outside of this range, keep on feeding the growth with plant food.
For plants in water, use about 1 drop per glass of water (250ml) per week.
For plants in soil, use about 3 times as much. If you have lots of plants, you might find the large bottle with the pump very practical. Use one pump for a 3L watering can.
The plant food is made of sugar beets, specifically a by-product called vinasse.
It’s vegan and organic, and made in Europe.
Organic fertilizers are derived from the remains of living organisms; in our case from sugar beets.
Organic fertilizers release their nutrients slowly: they dissolve in water, and they’re broken down by bacteria in the soil, providing nutrients as they decompose.
One of the many benefits of organic fertilisers is they improve the “structure” of the soil. They feed the microorganisms that convert nutrients, so plants can access them. Often, micronutrients are also present, which is not the case in synthetic fertilisers.
These fertilizers act slowly, that’s why it’s almost impossible to “burn” or kill roots or plants by applying too much. When overdosing with synthetic fertilisers, however, can have potentially fatal results for your plants.
Finally, synthetics fertilisers are produced from fossil fuels and mineral ore.
Our plant food is made from a renewable source, a by-product of sugar beets called vinasse, cultivated with organic agriculture.
It is! Our plant food is made of plants, for plants.
You might be wondering : are there plant fertilisers that are NOT vegan?
Yes, that’s very much the case. Many fertilisers use animal sources of nutrients, such as bone meal, blood meal and fish-based fertilisers. Cow manure fertiliser is often a by-product of large meat production facilities.
The N-P-K-ratio of our plant food is N-P-K 3-1-6.
The N-P-K-ratio is the percentage the product contains by volume of nitrogen (chemical symbol N), phosphorus (P), and potassium (K).
Yes! Our plant food is perfectly suited for your cuttings growing in water, and for your hydroculture plants. The gentle, organic formulation won’t burn the roots as synthetic fertilisers can.
Yes! Our plant food is a great choice for plants growing in any substrate, including LECA (clay beads) and other soil-free substrates. Lechuza Pon already contains (synthetic) fertilizer, so you only need to start adding new plant food when that fertiliser is already used up.
Neem Oil for your plants
Neem oil (also known as margosa oil) is a high-quality plant oil extracted from the seeds of the neem tree. The so-called Azadirchta indica is native to Southeast Asia, where it has been used as a remedy for thousands of years. Like most oils, neem tree oil is somewhat thicker in consistency and recognisable by its brown colour and distinctive smell.
Due to its many positive properties, the oil is used in many areas, such as cosmetic products, and household and animal care. The vegetable oil has also proven itself as natural plant protection and is often known among hobby gardeners as a miracle cure for pests.
Pests find their way onto our green friends from time to time, much to the sorrow of every plant owner. They can cause everything from a minor inconvenience to the actual death of the plant – depending on the type and severity of the infestation. Once there, it is difficult to get rid of the little critters. Rather than turning to chemicals, neem oil can help as a natural alternative. It is effective against different kinds of pests such as aphids, slugs and spider mites and also treats fungal diseases such as mildew. It can therefore be used for the prevention of pests or in acute infestations on both house or garden plants.
Moreover, neem is organic and biodegradable, which means that it does not settle in the environment. The non-toxic oil is safe for livestock, pets, birds and even fish.
Unlike chemical insecticides, neem oil does not kill directly, but interferes with the hormonal balance of the insects. The main active ingredient, azadirachtin, prevents the pests from reproducing and the larvae from developing. Due to the strong smell of the oil, the treated plant becomes inedible for the insects, which results in an inhibition of feeding behaviour. The stopped reproduction and the missing food source finally leads to the death of the insects.
To avoid an acute insect infestation from the get-go, neem oil can be used preventively. The smell of the oil plays a decisive role and makes the plant unattractive for the insect. It acts as a repellent. In both cases, the insects do not develop any resistance, so it will continue to work for you now and in the future.
Neem oil has only an impact on pests and does not harm other insects like butterflies, ladybugs or bees. Those beneficial insects don’t rely on the plant as a food source and are therefore not affected by the oil. With the use of neem oil insects can still live on the plant, just not eat it.
The use of neem oil depends on the needs of your plant, as it is effective for both prevention and acute infestation.
If there is an acute infestation, you should mix the oil with water and spray generously on the leaves of your plants, including the underside and the soil. Let it sit for 10 min, then gently wipe the leaves off with a soft cloth to keep them dust-free and shiny.
If you want to prevent your plants from insects, add the oil into your watering can. The plant will absorb the neem through their roots, strengthening them and protecting the plant from pests.
You should apply it around one or two times a week to get the acute infestation under control. If you just want to prevent your plants from any pests, you can use the neem oil every 7- to 14 days. Note that strong sunshine can cause burning on plant, since it’ll heat up the oil. It is best to spray the plant in the evening or a darker place in your home.
You can use neem oil on almost all plants, but you should be a bit more careful with plants in a sensitive state. This is the case for younger plants, especially those that are only a few months old. Also repotting leads to a lot of stress, which is why you should avoid using neem oil on your plants the days after. To find out how well your plant is coping with the vegetable oil, you can first test it on some leaves before applying it to the whole plant.
Another point to consider is the leaf structure of your plant. Neem oil will only be effective on leaves with a smooth surface. Hairy or prickly leaves provide an escape route for the pests, where the insect can hide from the oil.
Neem oil is safe to use on ornamental and edible plants. It can be sprayed on all kind of fruits, vegetables and edible flowers. Just wash them thoroughly with water before consuming.
Neem oil isn’t generally known for killing your plants, unless you use it in direct sunshine. If you apply the neem as mentioned on the packaging of the oil, your plant won’t take any damage.
A few millilitres of neem oil per litre of water are usually enough to keep your plant healthy and thriving. The recommended dosage for the Botanopia neem oil is 1:100, i.e. 1ml of oil to 100ml of water or 2.5ml for 250ml of water.
The active ingredients in neem oil begin to decompose after being mixed with water. This makes the mixture most effective within 24 hours. We recommend mixing only the amount that you want to use immediately.
The oil should also be stored in a cool and dark place.
The Botanopia neem oil is already formulated with Rimulgan* (an emulsifier), so it will easily mix with water in your spray bottle. You only need to add water.
As a rule of thumb if you are not using our own Botanopia neem oil:
In order to obtain a better solubility of neem oil in water, the use of emulsifiers, like Rimulgan, is recommended.
*What is Rimulgan?
Rimulgan is a natural, plant-based emulsifier made from castor oil and often associated with neem. It is mainly used to make neem oil soluble in water and therefore easier to use.
Plant Stakes
We have 2 different sizes of Plant Stakes.
You can choose the ideal size for you based on the size of your pots and the size of your plants.
The large size is 70cm /27,5 inches. They’re ideal to use in combinations with deeper pots, for good stability. Combine them with pots that are at least 30cm/12 inches high.
The mini size is 30cm/12 inches. Combine them with pots that are at least 10cm/4 inches high.
We love to use “plant velcro” to attach the plant stems to the plant stakes. You only need a small piece, and it’s adjustable. As the stem of your plants grow, you can easily adjust the fit of the velcro. This way, it’s never too tight, and won’t restrict the growth of your plants.
Bonus : did you know we include a little piece of plant velcro in every set of 4 plant stakes? Both the tall size and the mini size.
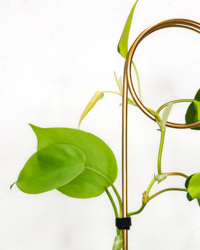
The plant stakes are made of recycled aluminium. It’s a metal that never gets rusty, so nothing to worry about.
Plant Supports and Plant Trellis
Our plant support chain is a great match for any trailing plant.
Here are some of our favourites:
Indoors :
Pothos, Monstera “Monkey Mask” (Monstera adansonii), “Mini Monstera” (Rhaphidophora tetrasperma), but also the less common but beautiful Tetrastigma or Cissus Discolor.
Outdoors:
Jasmine, Clematis, Passiflora, but also annual varieties such as Morning Glory, Sweet Peas or Nasturtiums. Ivy is also a good choice for a touch of green all year round.
Your options for indoor/outdoor choices might of course be very different based on your climate.
The plant support chains are made of brass, which is a metal that doesn’t rust. It’s can eventually oxidize, which creates a layer of patina on the surface. You can easily polish the brass back to a shine if you’d like. This shouldn’t happen fast though, as the surface of the chain is treated with a protective varnish.
Yes, our plant support chain is suitable to use outdoors too. If your area gets windy, then we advise that you affix the chain to your wall in at least 2 spots to avoid wind damage.
You can hang the plant chain with your choice of a screw, a nail or simply a renter-friendly push pin. If you are hanging plants on the heavier side, then we recommend you attach the chain at several points along the length, to distribute the weight and avoid stretching the chain’s rungs.
No. The chain is made of a thin sheet of metal. It’s well suited for a variety of smaller trailing plants. We wouldn’t recommend it for a very heavy Monstera.
Instead, here are some of our favourite plants that would be a good fit:
Indoors :
Pothos, Monstera “Monkey Mask” (Monstera adansonii), “Mini Monstera” (Rhaphidophora tetrasperma), but also the less common but beautiful Tetrastigma or Cissus Discolor.
Outdoors:
Jasmine, Clematis, Passiflora, but also annual varieties such as Morning Glory, Sweet Peas or Nasturtiums. Ivy is also a good choice for a touch of green all year round.
Your options for indoor/outdoor choices might of course be very different based on your climate.
Clippy Wall mounting kit
Our Clippy wall mounting kit is suitable for plant pots with a rim. The clip attaches to the edge of the rim, so that’s an important requirement.
The diameter of the pot can be 18 to 22 cm. The clip can be adjusted a little to give you a perfect fit on the edge of the pot.
If you want to make use of the cork plugs to close the drainage hole of your pot, the diameter of the hole can be ø 17 to 22 mm.
The pot can be made of several materials, such as terracotta, ceramics, plastic or resin, as long as it has a sturdy rim.
The steel Clippys are very tough and have been tested to carry up to 50kgs.
However, it’s very very important that you properly install it in your wall, using suitable anchors based on the material of your wall. A solid brick or concrete wall requires a completely different approach than a hollow wall made of plasterboard.
If you’re installing in plasterboard walls, we strongly recommend you screw directly in the studs. If that’s not possible, then use heavy-duty wall anchors especially designed for plasterboard.
Yes, Clippy is perfect indoors and outdoors. You can use it to add a little greenery to your fence, patio, or balcony for example.
If you are using the pots where they can get a lot of rainwater, we recommend leaving the cork plug out of the drainage hole. In the drier summer months, you can add the plug again, so you don’t have to water your plants as often.
Yes, the Clippys need to be attached with screws to support the heavy weight of your pots. If you can’t screw into your walls, it’s maybe an option to attach the Clippy to the side of your furniture, like a bookshelf for example.
Bolty hanging screw for plant pots
The Bolty hanging screw is compatible with any pot that has a drainage hole of 25mm ø maximum. If your pot doesn’t have a hole yet, you can also consider drilling one yourself. The total length of the screw is 24 cm, we recommend you use for pots that are maximum 22cm tall, so the hanging loop doesn’t end up buried underneath the soil surface.
The steel Bolty is very tough and has been tested to carry up to 40kgs.
However, it’s very very important that you hang it from a hook that can also handle the weight of your pots, and choose a suitable rope or chain to hang it from.
Yes, Bolty is perfect indoors and outdoors. It’s made of stainless steel, so it won’t rust.
No problem, you can just push your plant on the screw. Sounds scary, but it will be just fine. Here’s a little installation video to show you how:
Yes, we recommend using an S hook in the hanging hole of your Bolty, so you can easily take it on and off for watering or other plant maintenance. For example, we like to give our hanging plants a good shower once in a while, to dust them off and ward off any pests issues.

